是什么
在 Flutter 中,手势事件是用户与界面交互的核心机制之一。Flutter 提供了一套完整的 Gesture 系统,用于检测和响应用户的触摸操作(Tap、滑动、长按、缩放等)。
Gesture(手势):用户在屏幕上做出的动作,如点击、双击、拖动、缩放。
GestureDetector:最常用的手势检测组件,可以在它包裹的 Widget 上监听手势。
Listener:更底层的指针事件监听,可以监听原始的 PointerEvent(按下、移动、抬起)。
GestureDetector
GestureDetector 常用手势
| 手势类型 | 回调方法 | 说明 |
|---|---|---|
| 单击 | onTap |
用户轻触屏幕 |
| 双击 | onDoubleTap |
用户快速点击两次 |
| 长按 | onLongPress |
用户按住屏幕超过一段时间 |
| 按下 | onTapDown |
点击按下瞬间 |
| 抬起 | onTapUp |
点击抬起瞬间 |
| 拖动 | onPanStart / onPanUpdate / onPanEnd |
检测手指拖动(平移) |
| 滑动 | onHorizontalDrag / onVerticalDrag |
检测水平或垂直滑动 |
| 缩放 | onScaleStart / onScaleUpdate / onScaleEnd |
检测多指缩放手势 |
| 拖拽 | onPan* |
手指平移,可组合实现拖拽效果 |
基本示例
import 'package:flutter/material.dart';

// 手势识别: 继承了有状态的组件,因为后续的点击事件会重构UI
class GesturePage extends StatefulWidget {
  const GesturePage({super.key});

  @override
  // createState: 在有状态组件中,创建一个状态对象
  State<GesturePage> createState() => _GesturePageState();
}

// 状态类 : _GesturePageState 继承自State<GesturePage>
class _GesturePageState extends State<GesturePage> {
  // 定义两个变量,用于存储手势滑动的距离
  double? dx, dy;
  // GestureDetector
  // GestureDetector
  Widget _buildView() {
    return GestureDetector(
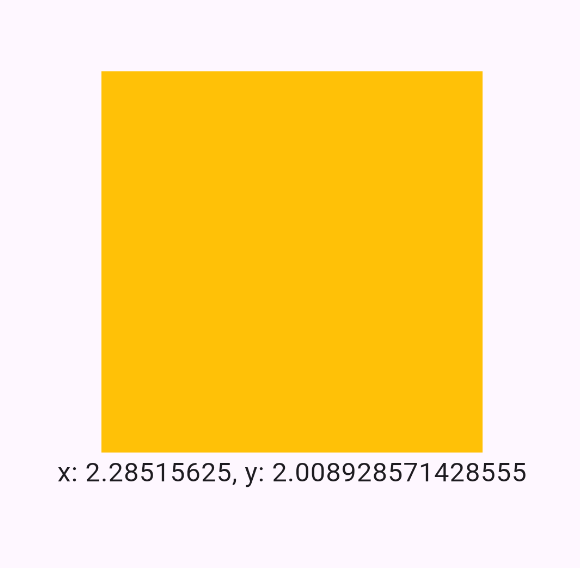
      child: Container(color: Colors.amber, width: 200, height: 200),
      // 点击
      onTap: () {
        print('点击 onTap');
      },
      // 长按
      onLongPress: () {
        print('长按 onLongPress');
      },
      // 双击
      onDoubleTap: () {
        print('双击 onLongPress');
      },

      // 按下
      onPanDown: (DragDownDetails e) {
        // DragDownDetails: 这是手势按下时的位置信息
        // e.globalPosition: 手势在屏幕上的位置
        print("按下 ${e.globalPosition}");
      },
      // 按下滑动
      onPanUpdate: (DragUpdateDetails e) {
        // DragUpdateDetails: 这是手势滑动时的位置信息
        // e.delta: 手势滑动的距离
        // e.delta.dx: 手势在x轴上的滑动距离
        // e.delta.dy: 手势在y轴上的滑动距离
        setState(() {
          // 更新dx和dy的值,dx和dy已经声明在上面的代码里了
          // double? dx, dy;
          dx = e.delta.dx;
          dy = e.delta.dy;
        });
      },
      // 松开
      onPanEnd: (DragEndDetails e) {
        // DragEndDetails: 这是手势结束时的位置信息
        // e.velocity: 手势结束时的速度
        print(e.velocity);
      },
    );
  }

  @override
  Widget build(BuildContext context) {
    return Scaffold(
      body: SizedBox.expand(
        child: Column(
          mainAxisAlignment: MainAxisAlignment.center,
          children: [
            // 调用_buildView方法,生成一个GestureDetector手势监视器
            _buildView(),

            // 显示手势滑动的距离
            Text('x: $dx, y: $dy'),
          ],
        ),
      ),
    );
  }
}
I/flutter ( 3413): 按下 Offset(190.8, 324.3)
I/flutter ( 3413): 点击 onTap
I/flutter ( 3413): 按下 Offset(190.8, 324.3)
I/flutter ( 3413): 长按 onLongPress
I/flutter ( 3413): 按下 Offset(164.6, 300.3)
I/flutter ( 3413): Velocity(0.0, 0.0)

使用GestureDetector必须是有状态的么
不一定必须是有状态(StatefulWidget),但是否需要 StatefulWidget 取决于你是否需要 在手势触发时更新界面(UI)。
使用 StatefulWidget 的场景:当手势触发时,你需要改变界面状态,比如:
- 更新文字显示当前手势类型
- 移动 Widget 的位置(拖动效果)
- 改变颜色、大小等
使用 StatelessWidget 的场景:如果手势只触发一些 不影响界面的逻辑,比如打印日志、调用函数、发送请求,可以用 StatelessWidget。
InkWell
基本概念
用途:响应用户点击手势(单击、长按、双击等),并提供 水波纹动画效果。
包裹 Widget:需要放在 Material 组件的子树下(如 Scaffold、Card、Container),否则水波纹无法显示。
优势:
- 内置水波纹动画,符合 Material Design 风格
- 支持多种手势回调(onTap、onLongPress、onDoubleTap 等)
- 可配合
Ink或Material控制背景颜色和圆角
常用属性
| 属性 | 说明 |
|---|---|
onTap |
点击时触发 |
onDoubleTap |
双击时触发 |
onLongPress |
长按时触发 |
borderRadius |
水波纹圆角,通常用于圆角按钮 |
splashColor |
水波纹颜色 |
highlightColor |
点击高亮颜色 |
child |
InkWell 包裹的 Widget |
基本示例
必须在 Material Widget 下
必须在 Material Widget 下
Material(
  child: InkWell(...),
)
否则水波纹无法显示。
class InkWellPage extends StatelessWidget {
  const InkWellPage({super.key});


  Widget _buildView() {
    return Container(
      width: 200,
      height: 200,
      decoration: BoxDecoration(
        color: Colors.green,
        borderRadius: BorderRadius.circular(20),
      ),
      // 这里是 InkWell,但是无法产生水波纹效果,因为没有包裹在 Material 组件中
      child: InkWell(
        // 点击
        onTap: () {
          print('点击 onTap');
        },
        // 水波纹颜色
        splashColor: Colors.blue,
        // 高亮颜色
        highlightColor: Colors.yellow,
        // 鼠标滑过颜色
        hoverColor: Colors.brown,
        //
        child: const Text('点我 InkWell', style: TextStyle(fontSize: 50)),
      ),
    );
  }


  @override
  Widget build(BuildContext context) {
    return Scaffold(
      body: Container(
        color: Colors.amber,
        child: Center(child: _buildView()),
      ),
    );
  }
}
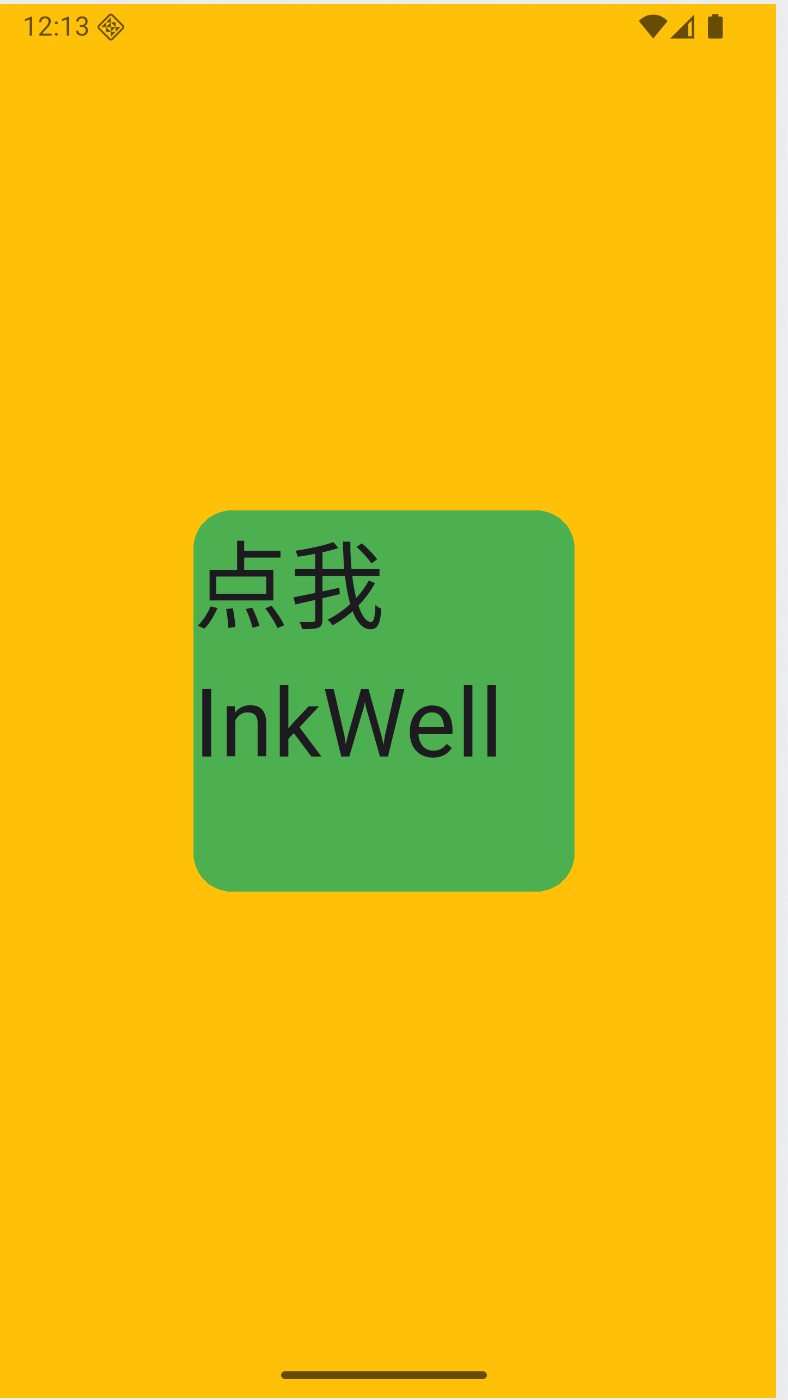
在这里点击了,却没有效果,没有产生水波纹

但是在简单背景(如白色 Scaffold)下会显示,这是因为实际上 InkWell 是画在 Material 上的
使用Material要保持背景透明
class InkWellPage extends StatelessWidget {
  const InkWellPage({super.key});
  Widget _buildView() {
    return Container(
      width: 200,
      height: 200,
      decoration: BoxDecoration(
        color: Colors.green,
        borderRadius: BorderRadius.circular(20),
      ),
      child: Material(
        // 透明背景
        // color: Colors.transparent,
        child: InkWell(
          // 点击
          onTap: () {},
          // 水波纹颜色
          splashColor: Colors.blue,
          // 高亮颜色
          highlightColor: Colors.yellow,
          // 鼠标滑过颜色
          hoverColor: Colors.brown,
          //
          child: const Text('点我 InkWell', style: TextStyle(fontSize: 50)),
        ),
      ),
    );
  }

  @override
  Widget build(BuildContext context) {
    return Scaffold(
      body: Container(
        color: Colors.amber,
        child: Center(child: _buildView()),
      ),
    );
  }
}

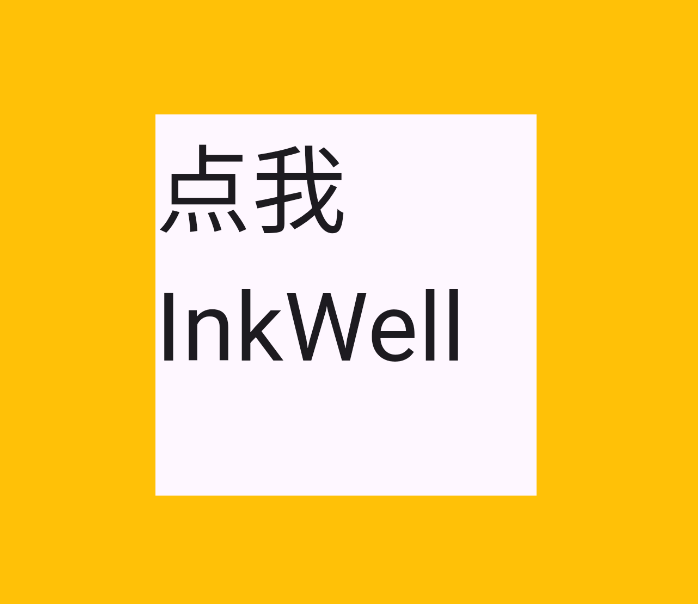
我们发现,原本应该是绿色的container变成了白色。这情况是 Container 背景色被 Material “覆盖”了,原因在于 Flutter 的绘制顺序:
Container (绿色背景)
  └─ Material (color: transparent)
       └─ InkWell
- Container 的背景色是通过
decoration.color绘制的 - Material 的 color 默认是白色,如果你设置
color: Colors.transparent,理论上是透明的 - 但是 InkWell 的水波纹效果是绘制在 Material 上的,Material 会在它自己的画布上绘制,这会影响 Container 的可视效果
- 在某些 Flutter 版本中,如果 Material 没有
color,InkWell 仍然会在 Material 上创建一个“ink canvas”,此时 Container 的背景可能看起来消失了(尤其是使用圆角时)
正确的搭配
Widget _buildView() {
    return Container(
      width: 200,
      height: 200,
      decoration: BoxDecoration(
        color: Colors.green,
        borderRadius: BorderRadius.circular(20), // 圆角
      ),
      child: Material(
        // 透明背景
        color: Colors.transparent,
        borderRadius: BorderRadius.circular(20), // 水波纹圆角裁剪
        child: InkWell(
          // 点击
          onTap: () {
            print('点击 onTap');
          },
          borderRadius: BorderRadius.circular(20), // 水波纹圆角
          // 水波纹颜色
          splashColor: Colors.blue,
          // 高亮颜色
          highlightColor: Colors.yellow,
          // 鼠标滑过颜色
          hoverColor: Colors.brown,
          //
          child: const Text('点我 InkWell', style: TextStyle(fontSize: 50)),
        ),
      ),
    );
  }

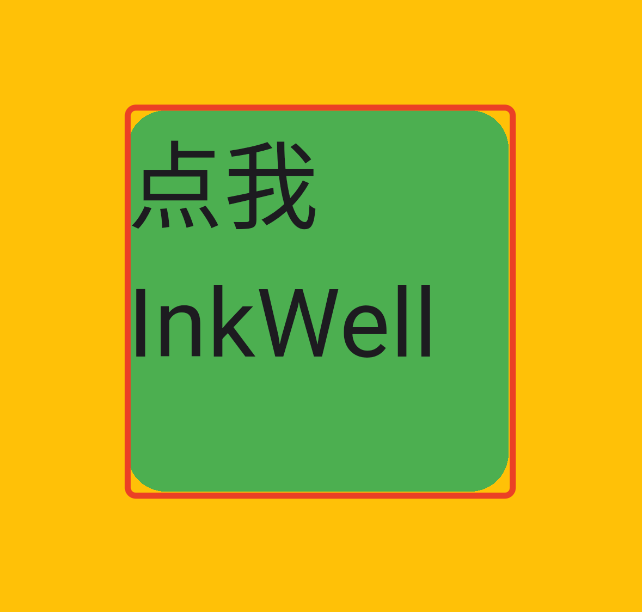
color: Colors.transparent:让Material的背景透明borderRadius: BorderRadius.circular(20):在父容器Container上面设置了20的圆角,如果Material和InkWell不设置,那么就会波纹就会溢出,到红色方块的位置。
总结注意事项
必须在 Material Widget 下
Material(
  child: InkWell(...),
)
否则水波纹无法显示。
圆角和 splashColor 一定要配合,否则水波纹可能溢出边界。
InkWell 更适合做“按钮”交互,而 GestureDetector 更适合复杂手势。

